
Mastering Brow Lamination on Thin Brows for Professionals
Without a doubt, yes. Brow lamination on thin brows is an incredible service that can completely reshape a client's face. It works by redirecting the existing hairs to create the illusion of fuller, thicker arches. For us as beauty professionals, mastering this technique means we can turn sparse brows into beautifully defined, feathered masterpieces. It’s a total game-changer for clients who thought full brows were just not in the cards for them.
Why Lamination Is a Game Changer for Thin Brows
As licensed cosmetologists and estheticians, we see it all the time: clients who feel stuck with their thin or sparse brows. They’ve tried every pencil, powder, and gel out there for a temporary fix, but what they really want is a professional solution with more impact and staying power. This is exactly where your expertise in brow lamination comes in, positioning you as the artist who can solve their biggest brow frustrations.
This service isn’t just for clients blessed with naturally thick brows—it’s an architectural art form for those with less to work with. The process softens the hair's cuticle, giving you complete control to reposition every single strand. With this technique, you can expertly cover sparse areas, engineer a higher arch, and even extend the tail, effectively building a fuller-looking brow from the hair they already have.
Maximizing Every Single Hair
The whole idea behind brow lamination on thin brows is to maximize the potential of what's already there. A professional-grade system, like Beauty Endevr's Brow Bomb, is specifically designed for this. It uses gentle, nourishing formulas that make the hairs pliable without causing damage—which is absolutely critical when you're working with delicate or fine brow hairs.
The goal isn't to add hairs, but to give each existing hair a specific job. By directing them upwards and outwards, you can increase the brow's surface area, making it appear significantly denser and more structured.
Why Lamination Excels on Thin Brows
Here's a quick breakdown of why this service is so perfectly suited for clients with sparse brows and what you, as the professional, should focus on.
| Benefit for Thin Brows | Professional Technique/Product Focus |
|---|---|
| Creates Instant Fullness | Use precise mapping to redirect hairs over gaps and sparse patches. |
| Defines Shape & Arch | Lift hairs vertically to build a stronger, more defined arch. |
| Tames Unruly Hairs | Gain control over coarse or downward-pointing hairs to fill out the shape. |
| Long-Lasting Results | Offers a 6-8 week solution, far beyond daily makeup application. |
| Boosts Client Confidence | Provides a dramatic transformation that clients previously thought was impossible. |
By focusing on these areas, you can deliver results that truly wow your clients and demonstrate the full potential of their natural brows.
Tapping Into a Growing Market
Trust me, this service is more in-demand than ever. The global brow lamination market was valued at $1.12 billion and is on track to hit $2.45 billion by 2033, growing at an impressive 8.7% each year. This boom is largely because the service works so well on all brow types, especially thin ones, making it an incredibly lucrative skill to add to your menu.
If you want to dive deeper into what’s fueling this trend, you can learn more about why brow lamination has taken the beauty industry by storm. By offering this specialized service, you're meeting a clear and growing client need and proving that dramatic, beautiful brow transformations are achievable for everyone.
Conducting a Flawless Client Consultation
Every incredible brow transformation starts long before you pick up a single tool. For clients with thin or sparse brows, the consultation isn't just a preliminary step—it's the most crucial part of the entire service. This is your chance to manage expectations, build genuine trust, and decide if brow lamination on thin brows is truly the right move for them.
Think of this conversation as your diagnostic phase. It’s where you shift from artist to trusted expert, asking pointed questions to uncover their brow history, what they hope to achieve, and any potential red flags. A rushed consult often leads to disappointment, but a thorough one lays the groundwork for a stunning result and a client who will come back time and time again.
Asking the Right Questions
To get the full picture, you have to dig deeper than a simple, "So, what are we thinking for your brows today?" Your questions need to be specific and insightful, giving you a clear understanding of the canvas you're about to work on.
I always start with their "brow journey." Ask about their past experiences with hair removal—are they still recovering from the over-plucked trends of the 90s? Knowing their natural growth patterns and cycle is key.
From there, I move on to their daily routine. Do they fill in their brows with makeup? Understanding what they're used to seeing in the mirror helps you gauge their expectations for fullness and shape. This is also the perfect time to gently educate them on how lamination really works.
Here’s how a typical conversation might go:
- Client: "I just want my brows to look so much fuller."
- You (The Pro): "I totally get that. The great thing about lamination is we can make the hairs you have look significantly fuller by redirecting them to cover more space. It's important to remember that the service works with the hairs you already have; it doesn't create new ones. We'll strategically place each hair to give you the illusion of the most density possible."
Identifying Contraindications for Thin Brows
Let's be real: not every client is a good candidate, and it's our professional responsibility to make that call. For those with thin brows, certain conditions can make lamination a risky bet. Spotting these issues protects the client's brows and, just as importantly, your reputation.
Keep an eye out for these key red flags:
- Extremely Short or Brittle Hairs: If the brow hairs are super short and sparse, there might not be enough length to reposition them effectively and cover gaps. Brittle hairs are also much more likely to get damaged during chemical processing.
- Large, Completely Bare Gaps: Lamination is a miracle worker for sparse areas, but it can't magically fill a gap where there's no hair at all. Trying to stretch hairs over a large bare patch often looks unnatural.
- Compromised Skin: Any sign of eczema, psoriasis, recent scarring, or sunburn in the brow area is an absolute no-go. The lamination solutions can cause serious irritation on compromised skin.
When you spot a contraindication, honesty is your best tool. Professionally declining a service doesn't mean you lose a client. It builds a foundation of trust that shows you put their long-term brow health above a single payment.
How to Professionally Decline or Suggest Alternatives
Saying "no" can feel awkward, but it's a non-negotiable part of being a true professional. The key is to frame it as a temporary pause, not a hard rejection.
For a client with very short, damaged hairs, you could say something like this:
"I can see you're aiming for a fuller, more defined shape, which is a fantastic goal. Right now, your brow hairs are a little too delicate for a lamination. My number one priority is keeping your brows healthy and strong. What I'd recommend is starting with a great nourishing growth serum for 6-8 weeks to strengthen them. Once they're a bit longer and healthier, you'll be an amazing candidate for lamination, and the results will be so much more dramatic."
This approach completely changes the dynamic. You're not just turning them away; you're creating a collaborative plan for their future brow goals. This move positions you as a trusted advisor, often leads to a retail sale for products like growth serums, and solidifies your client relationship for the long run.
Precision Mapping for Maximum Visual Fullness
Once you've wrapped up the consultation, it's time to put on your brow architect hat. This is where your skill and artistry truly shine, especially when you're performing a brow lamination on thin brows. A generic, one-size-fits-all map just isn't going to work here. We need to be strategic, treating every single hair like it's a precious resource for building that illusion of fullness.
Think of precision mapping less as a guide for hair removal and more as a blueprint for the final laminated shape. The goal is to create an outline that maximizes how dense and symmetrical the brows look. This initial design dictates your entire application, making sure you place each hair with intention to hide gaps and create a stronger brow frame.
Designing the Optimal Shape for Sparse Brows
Before you even think about grabbing your products, you need a clear game plan. Start by really looking at your client's natural brow structure. Pinpoint where the hair is thinnest and where you've got a bit more length to play with. With a soft, high-quality mapping pencil, begin sketching out a fuller, more defined shape.
You're not drawing on a brand-new brow from scratch. The idea is to create a subtle "container" just outside their natural hairline. This slightly expanded outline becomes your guide for brushing and setting the laminated hairs into place.
There are a few key points you'll want to establish:
- The Head of the Brow: Line this up with the inner corner of the eye. Keep the front soft and avoid making it look like a harsh, squared-off block.
- The Arch: This is your big chance to create a beautiful lift. I always mark the highest point just slightly outside the client's iris—it gives the most natural-looking elevation.
- The Tail: Draw a crisp, clean line from the outer corner of the nose, past the outer corner of the eye. A golden rule is that the tail should never dip below where the brow begins.
Nailing these key points gives you a balanced, symmetrical framework. It's what makes the final result look professionally sculpted and intentional, not like a stamp. The whole point is to design a shape that looks naturally full.
The Art of Preserving Every Hair
For thin brows, my mantra is simple: every hair counts. The biggest mistake you can make at this stage is getting too aggressive with hair removal. Your typical waxing or tweezing, where the goal is a perfectly sharp line, can actually work against you by removing hairs that could have been used to build density.
This requires a total mindset shift. Instead of focusing on what you can take away, think about what you can keep and repurpose. Those little stray hairs just outside the main brow line? Those are your secret weapons. During lamination, you can brush them right into your mapped shape to help fill in any sparse patches.
When doing a brow lamination on thin brows, that mapping outline you drew is the "safe zone." Only remove hairs that fall way outside this carefully planned shape. Keeping every possible strand is the real secret to getting that fluffy, full look everyone wants.
Gentle Hair Removal Where Absolutely Necessary
Of course, a little cleanup is usually required for a polished finish. The trick is to be incredibly conservative and precise. Forget about ripping a big wax strip that can take out too many hairs at once. Instead, you'll want to use methods that give you much more control.
Here’s how I approach minimal hair removal:
- Isolate the Strays: Once your map is drawn, use a spoolie to brush all the brow hairs up and into their new desired position.
- Assess with Precision: Take a close look at the hairs that are clearly outside your mapped line. Ask yourself: are they truly strays, or could they be brushed into place to add volume? You have to make this call on a hair-by-hair basis.
- Use Tweezers for Control: For the handful of hairs that absolutely have to go, a high-quality, slanted tweezer is your best friend. It gives you total control to pluck one hair at a time without disturbing its neighbors.
- Consider Precision Waxing: If you're a waxer, opt for a hard wax that you can apply in very small, precise patches. Only use it on areas far away from the main brow shape to clean up any obvious outliers.
This careful, gentle approach ensures you don't accidentally get rid of a hair that could have been a key player in faking a fuller brow. Remember, your client came to you to make their thin brows look thicker—aggressive hair removal completely defeats that purpose.
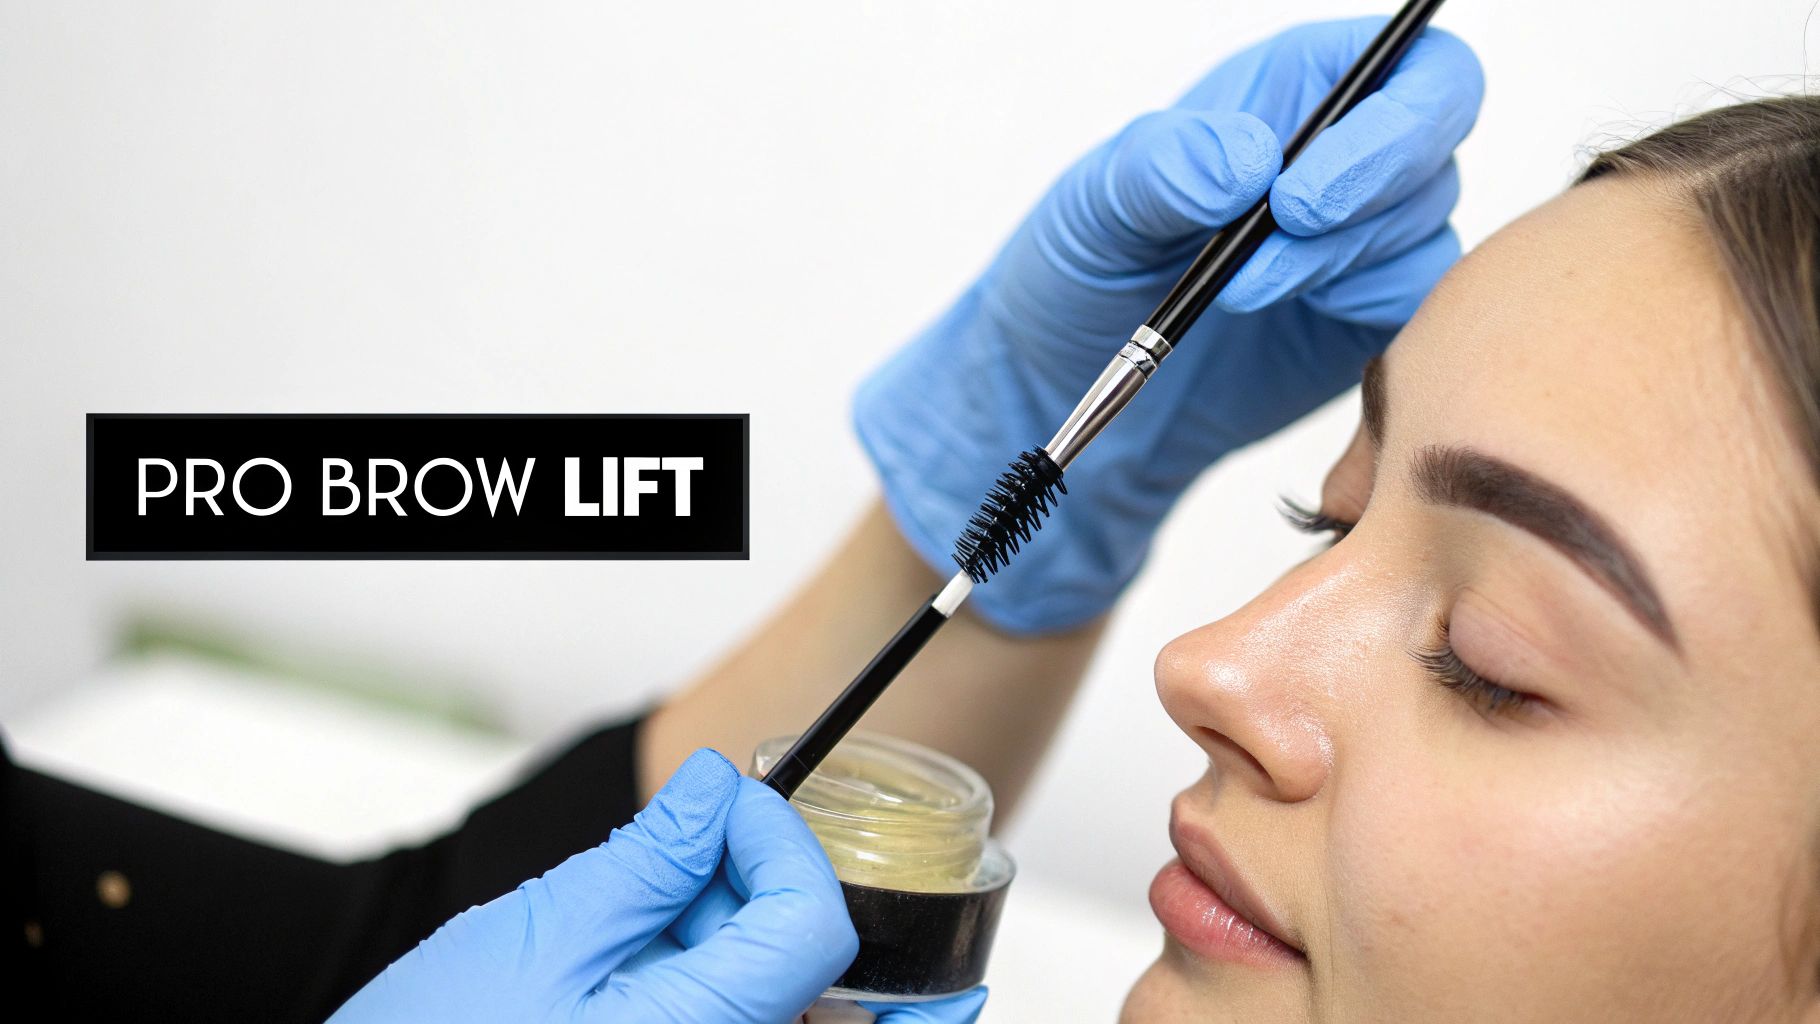
The Lamination Process Adapted for Delicate Brows
This is where the magic happens—the chemical process itself. When you're doing a brow lamination on thin brows, your entire approach needs to be more careful and precise than with thicker, more stubborn hair. This isn't a one-size-fits-all service; it’s a delicate dance where every second and every brushstroke counts.
Your success really comes down to two things: using a high-quality, nourishing lamination system and having total control over your processing times. Fine hairs are way less forgiving, so choosing a gentle but effective product isn't just a suggestion, it's a necessity for protecting the hair's integrity. It's why so many of us in the industry rely on systems like Beauty Endevr's Brow Bomb, which is formulated to condition the hair while it reshapes it.
Adjusting Processing Times for Fine Hair
The absolute biggest mistake you can make when laminating thin brows is over-processing them. It’s so easy to do. Fine hair has a much thinner cuticle layer, meaning chemical solutions soak in and get to work much faster. Leaving that lifting cream on for even a minute too long can result in dry, frizzy, or damaged brows—the complete opposite of the smooth, sleek look we're going for.
Always, and I mean always, start with the shortest recommended processing time for whatever system you're using. For clients with very fine or delicate brows, I'll often start checking the hair’s elasticity after just a couple of minutes. Gently nudge a few hairs with your tool. If they move easily and feel pliable, they're ready. Trust me, it’s far better to under-process a tiny bit than to over-process and cause damage you can't undo.
This diagram breaks down the fundamental steps that anchor the entire service, from the initial shaping all the way to the final tweeze.
This kind of structured, three-part method ensures that every move you make is intentional and helps build that final, fuller appearance.
When you're dealing with different hair types day in and day out, it helps to have a quick reference for your timings.
Processing Time Adjustments for Different Brow Types
| Brow Hair Type | Step 1 (Lifting Cream) Timing | Step 2 (Neutralizing Cream) Timing | Key Consideration |
|---|---|---|---|
| Very Fine/Sparse | 4-6 minutes | 5-7 minutes | Hair is delicate and processes quickly. Check elasticity early and often. |
| Fine to Medium | 6-8 minutes | 7-9 minutes | Standard timing, but still monitor closely to avoid over-processing. |
| Medium/Normal | 8-10 minutes | 9-11 minutes | Can handle standard manufacturer-recommended times. |
| Coarse/Resistant | 10-12 minutes | 11-13 minutes | Requires the longest time for the solution to penetrate the hair cuticle. |
Remember, this is a guide. Always use your professional judgment based on the specific client in your chair.
Mastering Precision Hair Placement
With sparse brows, the way you place each hair is just as critical as the chemical processing. This is where your artistry comes in. You can create the illusion of volume and density just by strategically positioning the hairs your client already has. The goal is a uniform, feathery look that seems effortlessly full.
Using a precision tool like a Y-comb or a micro-applicator, work in small, manageable sections. After applying the lifting solution, start brushing the hairs into their new home.
Pro Tip: To create the fullest look, brush the hairs upwards but also outwards at a slight 45-degree angle toward the temples. This fans the hairs out, covering more skin and making the brow look instantly wider and fluffier. For the very front of the brow, brush those hairs straight up to get that signature soft, lifted effect.
This directional brushing is the secret sauce for creating a seamless brow line and hiding any small gaps. Take your time with it—get every hair exactly where you want it before you lock it in with the setting solution.
Careful Removal for Healthy Brows
Once the hairs are set and the processing is done, the final step is to remove the solutions carefully. Don't just rub them off! Any harsh movements can mess up the placement you just perfected and irritate the skin.
Instead, take a damp, lint-free applicator or cotton round and gently wipe the solutions away, always moving in the direction of the newly laminated hair. This keeps everything perfectly in place. After the setting lotion is gone, it's crucial to apply a nourishing serum, usually a keratin-infused moisturizer. This final step seals the hair cuticle, locks in moisture, and leaves the brows looking glossy, healthy, and flawless.
For more tips on getting those perfect results every time, take a look at our guide on the essential tips for perfectly laminated brows.
Enhancing Results with Strategic Tinting and Aftercare
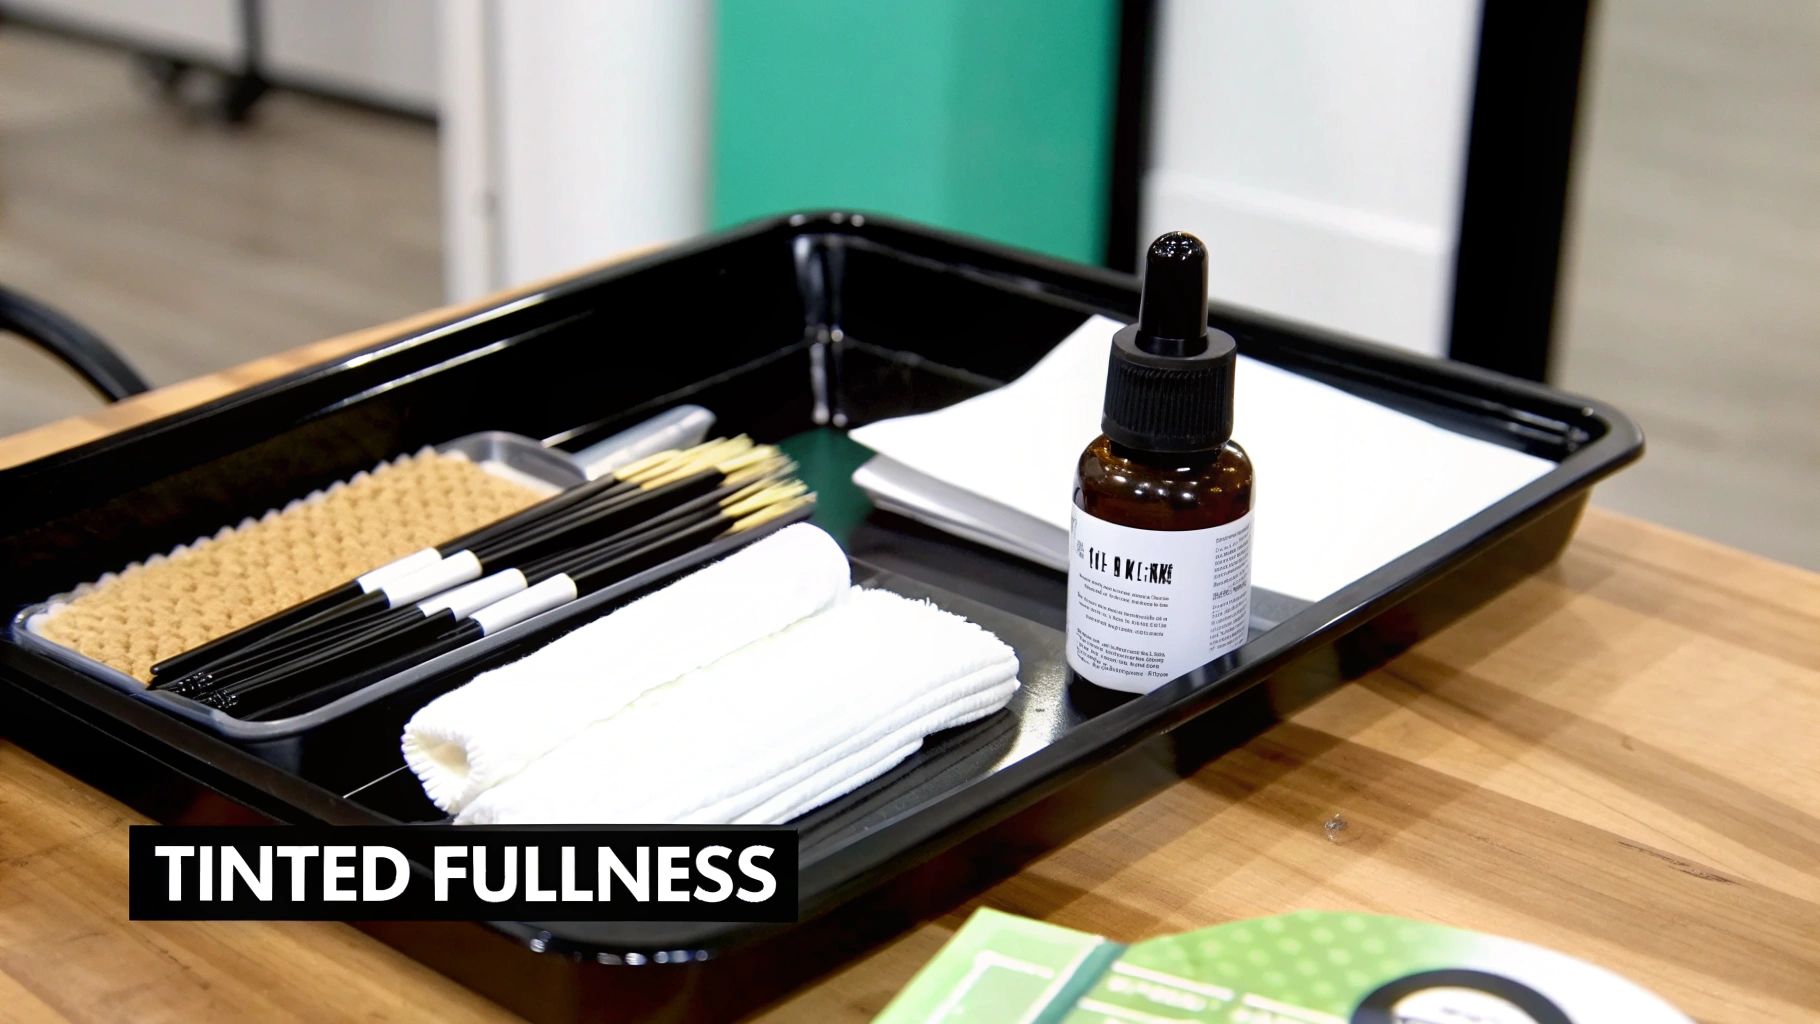
The lamination itself is just the beginning of the brow transformation. When you're working with sparse arches, the real magic happens in the finishing touches—specifically, with strategic color and disciplined aftercare. This is where you take a good result and make it truly exceptional, creating the visual density that completes the brow lamination on thin brows service.
Finishing with a simple tint is pretty standard, but thin brows demand a more powerful approach. This is where a hybrid stain becomes your absolute best friend. It doesn't just color the hair; it also stains the skin beneath it, creating a soft shadow that fills in gaps and makes the whole brow look fuller and more complete.
The Power of a Hybrid Stain
Traditional tints are fine for adding color to the hairs themselves, but their impact on the skin is minimal and fades almost immediately. For a client with sparse brows, just coloring the existing hair isn't going to cut it if you're aiming for that uniform, filled-in look. It's exactly why so many pros are switching to advanced hybrid formulas.
A product like the Hybrid Brow Pro Stain Kit from Beauty Endevr is built for this very challenge. It gives you the rich, long-lasting color you’d expect from henna, but with the simple and safe application of a tint. The stain can last on the skin for up to a week and on the hairs for up to six, giving clients a 'makeup' look that masterfully hides any sparse areas.
When you're applying the stain right after a lamination:
- Work Cleanly: Use your mapping lines as your guide and apply the stain with a precision brush. A crisp, clean application is everything for achieving a defined shape.
- Customize the Color: Never just use one shade. Mix them to create a custom color that perfectly complements your client’s hair and skin tone. I find that a slightly softer, more natural shade often looks best on thinner brows.
- Watch Your Timing: Laminated hairs are far more porous, so they'll grab color much faster than untreated hair. You have to keep a close eye on the processing time to make sure the color doesn't go too dark or intense.
Combining lamination with a hybrid stain is a serious one-two punch. It delivers the full, defined look clients with thin brows have been dreaming of.
Educating Your Client on Aftercare
All of your incredible work can be undone overnight if your client doesn't stick to the aftercare rules. As a professional, your job includes being a clear and firm educator. Those first 24-48 hours are absolutely crucial for making sure the lamination sets properly and lasts.
You need to give them simple, non-negotiable instructions. Make it clear that following these steps protects their investment and, more importantly, the health of their brows.
The golden rule of aftercare is simple: keep the brows completely dry for the first 24 hours. That means no water, no steam from the shower, no sweaty workouts, and no makeup. The chemical bonds are still settling, and any moisture can interfere with the neutralizer, causing the brows to drop.
Once they're past that initial window, the focus shifts from avoiding things to actively nourishing the brows. Laminated brows, especially fine ones, need daily hydration to stay healthy and flexible. This is the perfect moment to pivot the conversation from instructions to product recommendations.
Creating Retail Opportunities
Client education is the most organic sales opportunity you will ever get. When you explain why a nourishing serum is so important, you're not just pushing a product—you're providing a solution to maintain their beautiful results.
Explain it to them like this: chemical processing can dry out the brow hairs, just like coloring the hair on their head does. A daily dose of a keratin-infused aftercare serum replenishes that lost moisture, keeps the hairs soft, and stops them from getting brittle. This one simple step ensures their brows stay healthy and sleek for the full 6-8 weeks.
Recommending a specific, professional-grade serum that you carry in your salon closes the service loop perfectly. It shows you're a true brow expert who cares about the long-term health of their brows, not just the immediate look. This builds trust, boosts your revenue, and ensures your clients come back with healthy, happy brows for their next appointment. To get a refresher on all the details, you can review our complete guide on brow lamination aftercare.
Tackling Your Top Questions on Thin Brow Lamination
Even with the best training under your belt, lamination on thin or sparse brows can throw a few curveballs your way. Confidence as a pro comes from knowing exactly how to handle whatever challenge sits in your chair. So, let’s get into the most common questions I hear from other artists.
Think of this as your go-to FAQ, full of real-world advice to back up the techniques we've already covered and get you ready for those trickier client situations.
What Should I Do If My Client Has Gaps or Bald Spots?
This is probably the most common question I get, and honestly, it’s where your artistry really gets to shine. When a client has noticeable gaps, it's all about strategic hair placement. During the lamination, you'll want to use your precision tool to gently coax longer, nearby hairs over the sparse area, setting them in place to create a sort of camouflage.
After the lamination is done, a hybrid stain is going to be your best friend. It colors the skin behind the hairs, creating a shadow that gives the illusion of density and makes the whole brow look more uniform. The key is to explain to your client that while we can’t magically grow new hair, we can absolutely make the most of every single hair they do have.
Can I Laminate Brows with Very Coarse but Sparse Hair?
You absolutely can, but this scenario is all about your processing times. Coarse hair is just naturally more stubborn and resistant to chemical processing, so you’ll likely need to process closer to the maximum recommended time for your lamination system. But—and this is a big but—since the hair is also sparse, you have to watch it like a hawk to avoid over-processing.
My pro tip here is to do a quick strand test if you're even the slightest bit unsure. You're aiming to get the hair just pliable enough to redirect without frying it. Using a nourishing system, like the one in the Brow Bomb kit, is a non-negotiable for me in these cases because it conditions the hair while it works.
How Do I Manage Client Expectations for Extremely Thin Brows?
Being upfront and using visual aids is everything. During your consultation, pull out your portfolio and show them before-and-afters of clients who had similar brows. This helps them see what's realistic. You need to clearly explain that lamination will make their existing brows look much fuller and more defined by changing the hair structure, but it won't create hair where there isn't any.
I like to use phrases like, "We're going to maximize every single hair you have to create a beautiful, fluffy shape that really enhances your natural brows." I almost always suggest pairing the lamination with a hybrid stain for the best possible result and recommend a good growth serum for them to use at home. Setting these expectations from the get-go is the secret to a happy client who loves their results.
What Are the Most Common Troubleshooting Issues?
With thin brows, the two biggest things that can go wrong are over-processing and ending up with that unnatural, "stuck-to-the-skin" look. To avoid over-processing delicate hairs, always, always start with the minimum recommended processing time and check the hair’s elasticity often. If the hairs start to feel mushy or you see any breakage, you need to stop immediately.
And to steer clear of that harsh, plastered-down look, make sure you're brushing the hairs upwards at a slight angle—not pressing them flat against the skin. If you finish the service and the result still feels a little severe, you can apply a nourishing conditioner and gently brush the brows into a softer shape right away to relax them a bit.
Ready to elevate your brow game? We've got the professional-grade products you need for flawless results, every time. At Beauty Endevr, we stock the industry-leading tools, kits, and education to help you master techniques like brow lamination on thin brows. Get the best for your studio at https://beautyendevr.com.